Giving Thanks: Reflections On Our First Year & A Gift For You

At a time when many of us paused to count our blessings, I did, too, for Wrappily. The result spurred this blog post. You see, Wrappily had a birthday last week Thursday. At the time, I thought launching our website on Thanksgiving day was a bit ludicrous, but now I see it was absolutely perfect—there actually is no better day for an anniversary. I spent the long weekend reflecting on my journey over the last year and, quite literally, giving thanks for just how far this little idea of mine has come, for all the people who have jumped in to help along the way, and for the many highs and lows (hey, no journey is complete without them). I'm delighted to realize I get to do this every year.
My retrospection concluded with a sense of accomplishment—and a dizzying feeling about the the workload ahead. Simply put, I am awe-struck, electrified, and totally jazzed-up about the path Wrappily is on. I am humbled to my knees in gratitude for the support and enthusiasm we've received. Friends, we are making this thing happen! THANK YOU!
Year One By The Numbers:
- Worked with 15 different independent designers
- Current inventory of 19 different reversible sheets—that’s 38 patterns total!
- Expanded our product line to include two different DIY gift topper kits
- Printed in two different states, on four different newspaper presses
- Printing and fulfilling in two regions, Hawaii and the Pacific Northwest out of Washington. (California—we have our sights set on you in 2015.)
- Refined our packaging to a version 2.0 (if you will.) Our 3.0, a custom-printed bag, is on the way. (squeee!)
- For sale in five different states
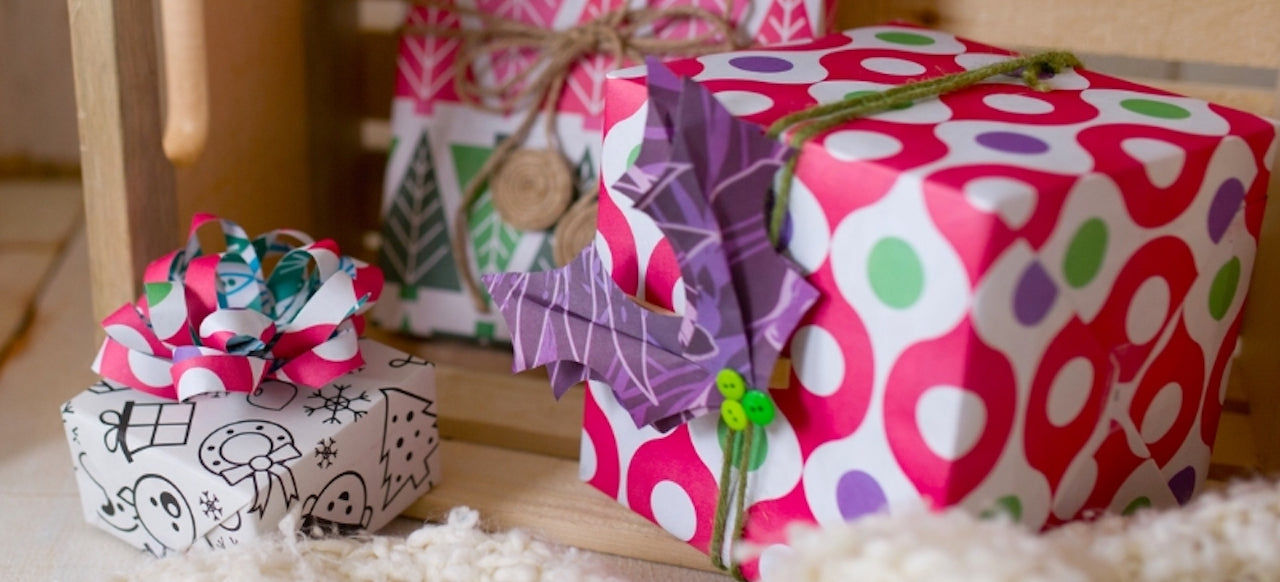
To celebrate, I have a gift for you. Without you —our believers and early adopters— we wouldn’t have gotten off the ground. Attached here is a free download and tutorial for our paper holly gift topper, this cute little guy will come in handy this holiday season. It's is easy to make and highly customizable, have fun getting creative with it.
Mahalo,
Sara Smith
Founder
DO IT YOURSELF: PAPER HOLLY GIFT TOPPER

DIY this Paper Holly gift topper with Wrappily, perfect for your holiday Christmas gift wrapping.
Download stencil HERE. Cut along lines to create your holly stencil. NOTE: we've provided two stencil sizes to accommodate larger and smaller packages. Choose the one that works best for you.

Use a pencil to lightly trace stencil onto your Wrappily paper. We love saving our odd scraps and cut-offs for projects like these.

Cut shapes out. You’ll need four leaf shapes for each topper. Use the same paper for all four, or play around with mixing and matching colors and patterns.

Fold a single pleat at the base of each leaf. Secure with a sliver of tape if desired.

Layer two leaves on top of each other, being sure to align each shape.

Repeat. You should have two sets of leaves.

Place sets at about a 45 degree angle to each other, being sure to overlap the leaf bases. Secure with a glue dot, reversible tape, or a small staple.

Add three “berries” using buttons, mini-pompoms, puka shells, bits of construction paper, or glue and glitter. Get creative here!

Clean-up by trimming berry corner of stray scraps of paper and tape.

Leave as is and use as a stick-on topper (apply to gift with a glue dot or reversible tape), or make it a clip-on by mounting on a clothespin with hot glue or a few glue dots.
Congratulations! You just created something beautiful and fun. Happy wrapping!

DIY Paper Holly gift topper with Wrappily - Holiday Christmas Gift Wrapping
Leave a comment
Comments will be approved before showing up.