Dreaming of a Bright Christmas

For so many corners of the globe Christmas is a warm and sunny affair. While we love the traditional Christmas look of wooly plaids and snowy themes, we were craving something that resonated more for those of us that live in the tropics (or for that matter, the whole Southern Hemisphere who celebrates Christmas in heat of mid-summer!)
 For tropical gift wrap inspo we turned to the brightest ray of sunshine we know, interior designer, party stylist, and serial crafter Tara Gray of @ModernMaven and @MiniMavenSocial. We don’t know anyone more daring with color, pattern mixing, or a pair of scissors. For us here, she’s shined her light on some unabashedly fun holiday gift wrapping tutorials.
A transplant to Hawaii from Colorado, Tara’s effortlessly adopted a signature island-vibe that’s grown her following from near and far. Whether it’s on social media or in one of her sought-after crafting workshops, Tara feels very strongly about encouraging people to indulge their creative selves.
Be confirmed, she walks her talk.
If you’re ever on Maui, look for her cruising around in Miss Maven, her bloomtastic lime green vintage 1978 VW Bus, that she also rents out for photoshoots and special events. And if you get the chance, join her for a workshop, your creative self will thank you.
 Hawaii-based designer Tara Gray, cruising in her vintage VW bus, Miss Maven. "Her happy tropical look always makes people smile," says Tara.
Photos: Kelsey Hetzler
 Hawaii-based designer Tara Gray, cruising in her vintage VW bus, Miss Maven. "Her happy tropical look always makes people smile," says Tara.
Get the Look: Pro Tips for Bright Holiday Gift Wrapping
My approach is always to pour a lot of heart into my projects - Tara
Color Play
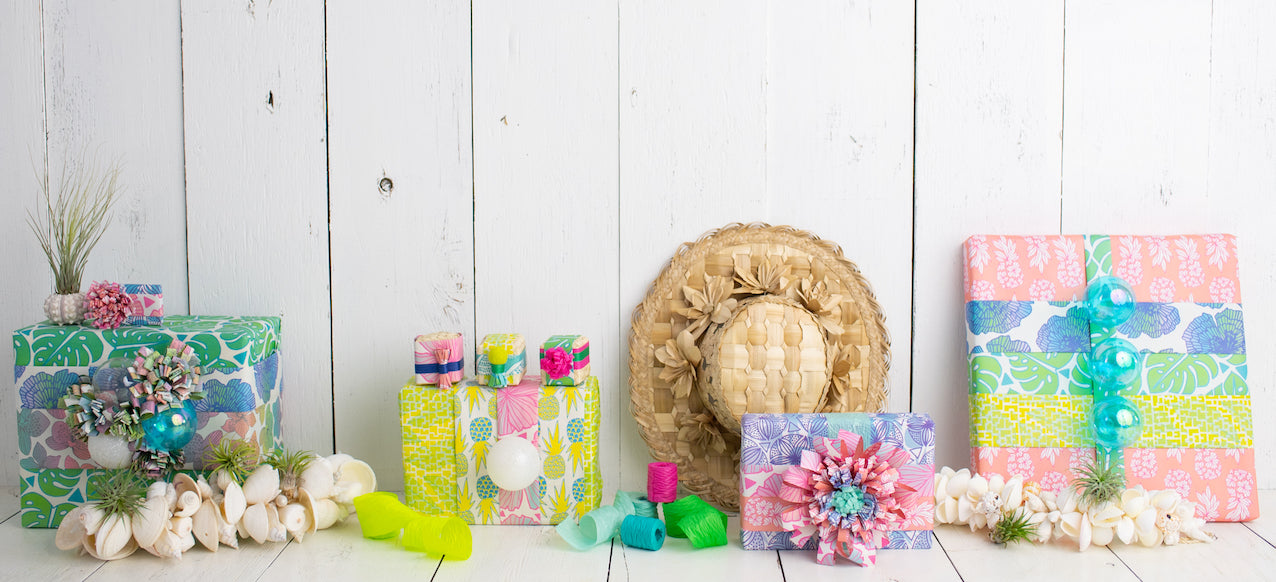
"Color is my favorite design tool and I cannot imagine creating without it,” Tara tells us. Through her years of interior design she’s encountered many people who shy away, but using a lot of color makes her happy. Though she admittedly follows a few rules when designing living spaces, she says when wrapping presents, “there truly are no rights or wrongs, except to have fun.”

Pattern Mixing
“I love Wrappily because, especially for someone new to mixing and matching, each paper has built-in coordinating pattern combos,” she shares. “Something as simple as wrapping with one side and using the other to create a bow or band adds a fun twist to your presents.”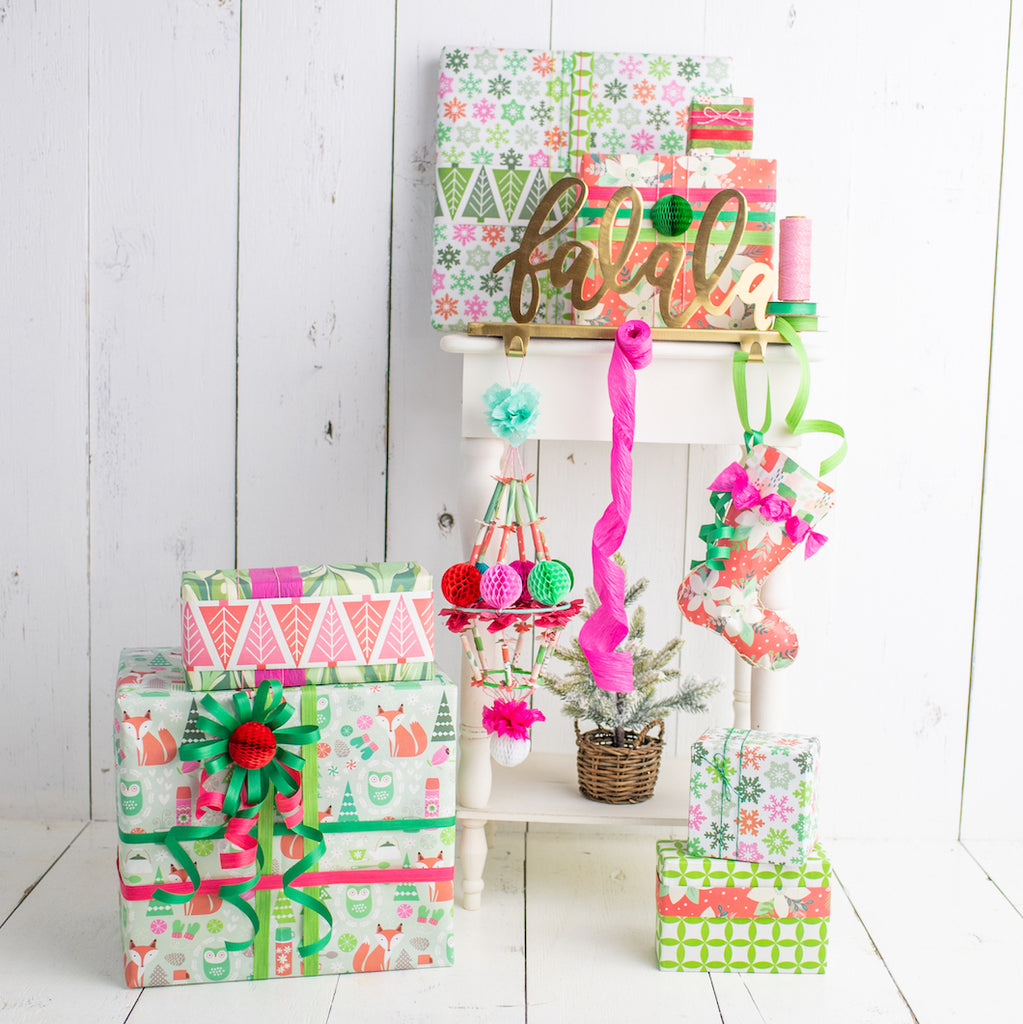
In true maximalist style, Tara takes it a step further by choosing two papers and using all four patterns to wrap one package. “I add paper bands around the packages or even weaving paper strips along with Wrappily’s great selection of ribbons.”

Layering Textures
 “I’m always thinking how I can make something a little bit extra or add some special detailing,” she tells us.
From crinkly paper to twisted twines, she sees building with the ribbons as an opportunity to add interest and a bit of the unexpected to her packages. Whether stacked atop one another or woven together, adding layers of different solid ribbon colors adds texture and ties the whole package together.
Gift toppers are another way Tara brings in a punch of texture for visual depth, from tight fuzzy felts to exploding paper blooms {DIY it! Step-by-step tutorial below.}

Getting Crafty
“Wrappily’s dual-sided papers are perfect for craft projects and room decorations,” Tara adds. She makes garlands by stitching paper shapes together or more simply by using decorative hole punches to make shapes such as flowers or stars and stringing them together on twine, adding embellishments on the whim of her creative flow.


 And why does a gift have to be wrapped in a box anyway? Why not fashion a fancy little paper stocking and present it that way? Afterall, Tara says, "creating smiles is what it’s all about."
Her parting words for us: “Have fun and indulge in your creative self!”
Happy wrapping!
- - -
DIY: Wrappily Bloom Bow
by @MiniMavenSocial

Make an impact with this paper gift topper, the fun part is playing with patterns and colors. And make the bloom as big as you want—the more the better!
Supplies needed: a variety of Wrappily papers, scissors, and a hot glue gun.
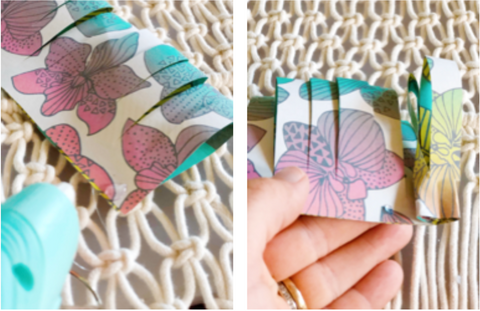
1. Choose your papers and cut to desired size. When you fold in half lengthwise, this will be the approximate height of your topper. In this tutorial, we will refer to the paper as having a 'folded' edge and a 'loose' edge.

2. Start by making the center of the bloom. Fold your selected paper in half lengthwise. Cut thin strips all along the folded side of the paper, stopping about half inch before the tip of loose edge.

3. Begin to roll the center of your bloom. Place a dab of hot glue on the loose edge of your paper and roll. Continue until the entire strip is rolled, adding glue as necessary to help keep the base in place. The folded edge will begin to open up as your petals, while the glued loose edge creates the base.
4. Add the next layer by repeating the previous two steps. For more depth choose contrasting colors and paper patterns.

5. Once the bloom has reached your desired size, gently open and fluff the petals for a fuller look. Start from the outside and work your way in.

6. Now you’re ready to layer it onto your packages. Use alone, in groups, or with other toppers for show stopping gift topper.

Leave a comment
Comments will be approved before showing up.